


High Quality Home Putting Greens How to Get Pro Level Ball Reactivity

A home putting green can look perfect and still play poorly. That is the surprise many golfers run into after installing basic synthetic turf in the backyard. The surface is green, the cup is there, and the photos look great, but the ball skids, hops, dies early, or rolls like it is on carpet.
That gap between appearance and performance is where quality matters.
A true practice green is not just a patch of turf with a hole cut into it. It is a built system. The base, slope, turf type, infill, fringe, drainage, and cup placement all affect how the ball reacts. For golfers who care about touch, pace, break, and repeatable practice, those details make the difference between a backyard feature and a surface that helps improve a real short game.

Why a standard turf installation is not enough
Most artificial turf projects are designed for appearance, comfort, and low maintenance. That works well for lawns, pet areas, play spaces, and poolside landscaping. A putting green has a different job. It has to control a rolling golf ball.
Standard turf often has longer blades, softer backing, and a surface that is meant to feel plush underfoot. Those qualities can work against putting performance. A golf ball needs a dense, tight, consistent surface. If the turf holds the ball too much, the putt feels sluggish. If the fibers are too springy, the ball may wobble. If the base underneath is uneven, the putt can drift for the wrong reason.
A basic turf crew may know how to make a yard look clean. A skilled putting green installer knows how to shape play.
The biggest differences show up in four areas:
Base preparation
A putting green needs a compacted, stable base with precise shaping. Small imperfections can affect the roll.
Surface speed
The turf and infill should create a pace that feels useful for practice, not too slow and not unrealistically slick.
Ball reaction
The ball should start smoothly, hold its line, and respond to slope in a predictable way.
Long-term stability
The green should resist settling, wrinkling, pooling, and uneven seams over time.
A backyard lawn can tolerate small dips. A putting green cannot. A dip that barely shows underfoot can turn a straight three-foot putt into a guessing game.
Pro level ball reactivity starts below the surface
Golfers often focus on the turf product first. That matters, but the green starts underneath.
The base is the foundation for every putt. Installers typically remove existing grass and soil, then build up a compacted aggregate base. The installer shapes this base to create the final contours of the green. A gentle left-to-right break is not created by the turf. It comes from the base below it.
If the base is too soft, it may settle. If it is not compacted evenly, some areas will roll faster than others. If the installer creates harsh slopes, the green may look dramatic but become frustrating to use.
A professional-style green should have intentional contouring. The goal is not to create random mounds. The goal is to create practice situations that make sense:
Straight putts for alignment work
Slight breakers for reading speed and line
Uphill putts for acceleration control
Downhill putts for touch
Cup locations with enough flat area around the hole
Good design gives the green variety without making it gimmicky. That matters for serious practice. A golfer should be able to repeat a putt and learn from the result.
In Central Texas, base work also has to account for heat, heavy rain, clay soils in some areas, and limestone conditions in others. Poor drainage can shorten the life of the green and create soft spots. A well-built system moves water away from the surface and keeps the base stable.
The turf and infill decide how the ball feels
Once the base is right, the surface has to match the intended style of play. Putting turf is typically shorter, tighter, and denser than standard landscape turf. The fibers should support a smooth roll without grabbing the ball.
Infill also plays a major role. A sand infilled putting green can offer a more controlled and natural roll when installed correctly. The sand helps weigh the turf down, support the fibers, and fine-tune the speed of the surface. Too little infill can create a fuzzy, inconsistent roll. Too much or poorly brushed infill can make the green feel heavy or uneven.
For many players, the goal is simple: a professional putting green feel in a backyard putting green, often built as a sand infilled putting green rather than basic landscape turf.
That does not mean every home green should be extremely fast. Golf course greens vary by course, season, grass type, and maintenance style. A backyard green should match how it will be used. A family practice area may need a friendly pace. A competitive golfer may want quicker rolls, sharper breaks, and more demanding cup placements.
What professional-level ball reactivity actually means
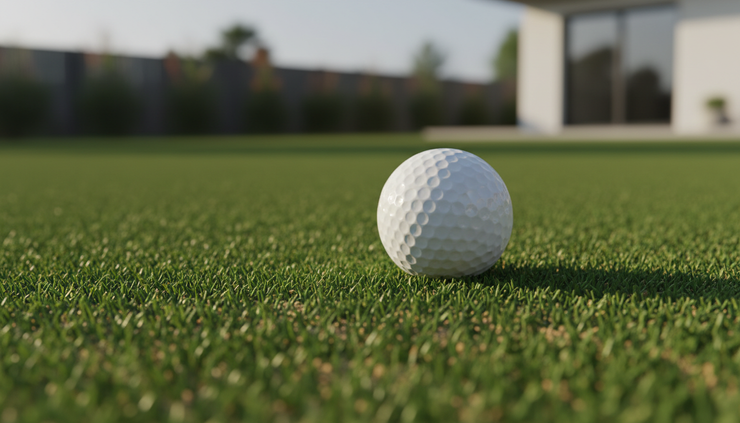
“Ball reactivity” sounds technical, but golfers feel it right away. It is the way the ball behaves after impact and as it travels across the green.
On a high-quality putting surface, the ball should:
Start online without bouncing or skidding excessively
Roll at a consistent speed across different areas
Respond naturally to slope
Slow down in a predictable way
Hold its line unless the contour says otherwise
Feel similar enough to course conditions to make practice useful
Poor ball reactivity creates confusion. A good stroke might produce a bad result because the surface is flawed. That makes practice less valuable. Over time, it can even train bad habits because the golfer starts adjusting to the defects of the backyard green instead of improving a real putting stroke.
A quality green gives honest feedback. Miss the line, and the ball misses. Hit the right pace, and the ball tracks as expected. That kind of feedback is what makes home practice worthwhile.
Design matters as much as installation
The best putting greens are designed, not just installed. The shape should fit the yard, the golfer, and the way the space will be used.
A long, narrow side yard might be perfect for lag putting practice. A larger backyard may allow multiple cups, fringe areas, and short chip shots. A compact courtyard can still support a serious putting station if the contours are planned well.
Good design balances playability and outdoor living. The green should feel connected to the yard, not dropped in as an afterthought. Edging, stonework, lighting, drainage, and surrounding landscaping all affect the final result.
This is where Allscapes Construction stands out. The company specializes in designing and installing custom putting greens that aim to mimic the playability of a professional golf course. That means the focus goes beyond making artificial turf look clean. The work centers on shaping a surface that rolls correctly, drains properly, and fits the property.
For homeowners in the Austin area, that local experience matters. A green that performs well has to be built for the soil, weather, sun exposure, and outdoor living style of the region.
The hidden challenges that separate good greens from average ones
A putting green looks simple after it is finished. During installation, it is anything but simple.
Getting the slope right
Slope must be subtle enough for regular use but interesting enough for practice. Too flat, and the green becomes boring. Too severe, and it becomes a novelty. The best greens include a mix of readable, repeatable breaks.
Creating clean seams
Synthetic turf seams should be tight and placed with care. A bad seam can affect appearance and ball roll. On a putting surface, even a small ridge or gap can become a problem.
Setting cups correctly
Cup placement requires more thought than many people expect. Cups need stable support, clean edges, and enough surrounding space for realistic putting. A cup set on an aggressive slope may look fun but play poorly.
Managing fringe and transitions
A good fringe area adds realism and expands practice options. It also creates a transition from green to landscape. If the fringe is too tall, too soft, or poorly joined to the putting surface, chips and putts can react strangely.
Planning for drainage
Water should never sit on a putting green for long periods. Drainage planning protects the base, the turf, and the usability of the space after rain.

How Allscapes Construction approaches home putting greens
A strong putting green project starts with questions. How often will the green be used? Is it for casual family fun, serious practice, or both? Will golfers chip into it? How many cup locations make sense? Should the surface roll like a private club practice green or a more relaxed home setup?
Allscapes Construction uses those answers to guide the design. The process typically centers on a few core goals.
Design focus | Why it matters for play |
Proper base shaping | Creates true breaks and stable roll |
Quality putting turf | Supports smoother ball movement |
Correct infill work | Helps tune surface speed and consistency |
Drainage planning | Prevents soft spots and standing water |
Natural integration | Makes the green fit the yard and home |
The result is a green that serves as both a golf feature and a finished landscape element. That combination matters. A backyard green should be useful for practice, but it should also look like it belongs in the space.
Allscapes Construction also understands that homeowners may not know the technical side of putting green installations. A good installer should explain why certain turf, base materials, slopes, and layouts make sense. Clear communication helps prevent a common mistake: choosing the cheapest turf option and expecting course-like performance.
What homeowners should look for in a putting green installer
Choosing the right installer is the most important decision in the project. A high-quality putting green is too specialized for guesswork.
Look for a service that can explain the full system, not just the turf product.
Ask about putting green experience
Landscape turf experience is useful, but it is not the same as putting green experience. Ask to see examples of completed greens. Look for projects with clean contours, realistic cup placement, and well-finished edges.
Ask how the base will be built
The installer should be able to explain excavation, aggregate choice, compaction, contouring, and drainage. Vague answers are a warning sign.
Ask about turf and infill options
A good installer will not treat every green the same. The right turf and infill depend on the desired roll, expected use, and site conditions.
Ask how they create speed and break
If the answer is only about the turf, keep asking. Speed and break come from the complete system. The base, slope, turf, and infill all work together.
Ask about maintenance
Synthetic putting greens are low maintenance, not no maintenance. The installer should explain brushing, debris removal, occasional infill attention, and how to keep the surface clean.
Ask how the green will fit the rest of the yard
The best projects account for patios, pools, paths, plants, lighting, and drainage. A putting green should improve the whole outdoor space.
A trustworthy installation service will welcome detailed questions. The answers should feel specific, not rehearsed.
Common mistakes that hurt performance
Many disappointing home greens come from the same avoidable errors.
Choosing turf based only on appearance
Building the base too quickly or too loosely
Ignoring drainage until after a problem appears
Making slopes too extreme
Placing cups where putts cannot finish naturally
Skipping proper infill installation
Treating fringe as decoration instead of a playable area
Hiring a general turf installer without putting green experience
The most costly mistake is assuming all artificial turf performs the same. It does not. A putting surface has to be engineered for the roll of a ball, not just the look of grass.
What success looks like after installation
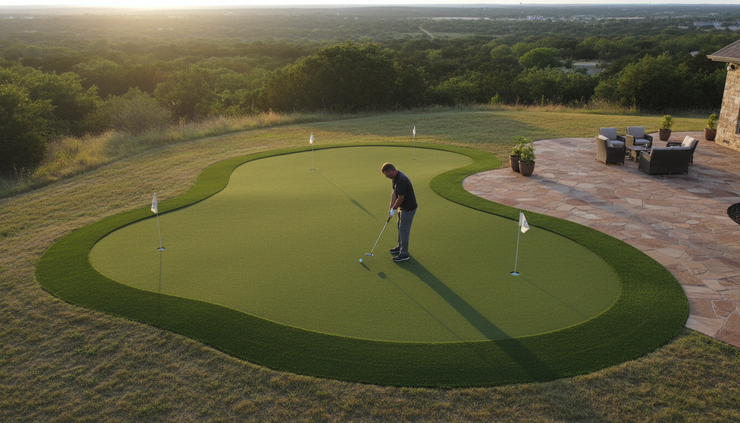
A great home putting green should invite use. It should make it easy to step outside for ten minutes and work on distance control, start lines, and breaking putts. The ball should roll smoothly enough that practice builds confidence instead of frustration.
The green should also hold up as part of the landscape. Edges should stay clean. Cups should remain stable. Drainage should work after a storm. The surface should feel consistent enough that golfers trust the feedback.
That is the real value of hiring a specialist. Allscapes Construction brings the design and installation knowledge needed to create putting greens that do more than fill a corner of the yard. They create practice spaces with the look, feel, and ball response golfers expect from a serious surface.
A home green does not need to copy a famous course to be worth building. It needs to fit the property, match the golfer’s goals, and perform the same way every time the putter meets the ball. When the base, turf, infill, and design all work together, the backyard becomes a place to sharpen touch, enjoy the game, and make practice part of everyday life.


Comments